Printing Sales Orders
Users can print a sales order receipt until the order is finalized/invoiced. Once the sales order is finalized/invoiced, users cannot print order receipt.
Users can print order receipts using the following options:
-
Create & Print from the New Order page
-
Print from the View Order page
Click Sales ➜ Sales Orders.
Click on the preferred order from the Orders List section. The selected order opens in a new window.
Click Print. The Output Settings popup window appears.
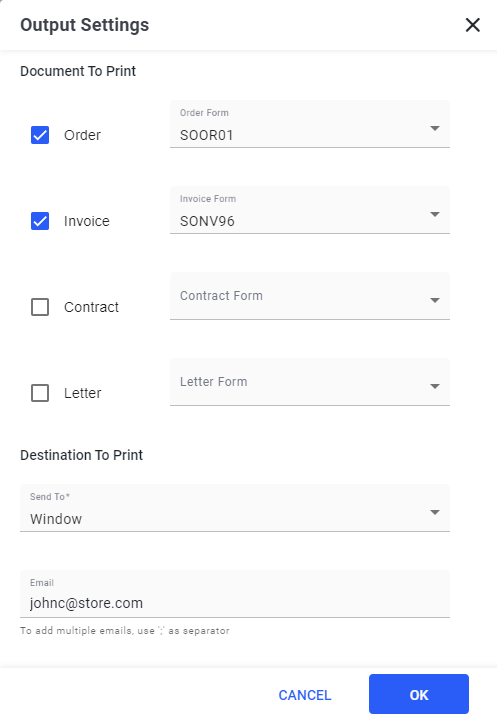
Select the preferred checkboxes to be printed under the Document To Print section. Available options include the following:
|
Field |
Description |
|---|---|
|
Order |
This value defines the selection of form selected for print. When this checkbox is selected, the selected order print form must be processed to the selected destination. |
|
Invoice |
This value defines the selection of form selected for print. When this checkbox is selected, the selected invoice print form must be processed to the selected destination. |
|
Contract |
This value defines the selection of form selected for print. When this checkbox is selected, the selected contract print form must be processed to the selected destination. |
|
Letter |
This value defines the selection of form selected for print. When this checkbox is selected, the selected invoice letter form must be processed to the selected destination. |
Select the preferred form from the drop-down menu based on the document selection. Available options include the following:
-
Order Form
-
Invoice Form
-
Contract Form
-
Letter Form
Refer to the following table and enter the values for the following fields under the Destination To Print section:
|
Field |
Description |
|---|---|
|
Send To |
Select any one of the following options:
|
|
|
The destination email address. To enter multiple email address, use comma (,) as a separator. |
Click Ok. The report is either generated or sent to the destination email address based on the options selected in the Destination To Print section.
Sample Report
