Creating Quick Orders
Click Sales ➜ Quick Orders. The Quick Orders page appears with the number of quick orders based on the status of quick order.
Click Create New. The New Order page appears.
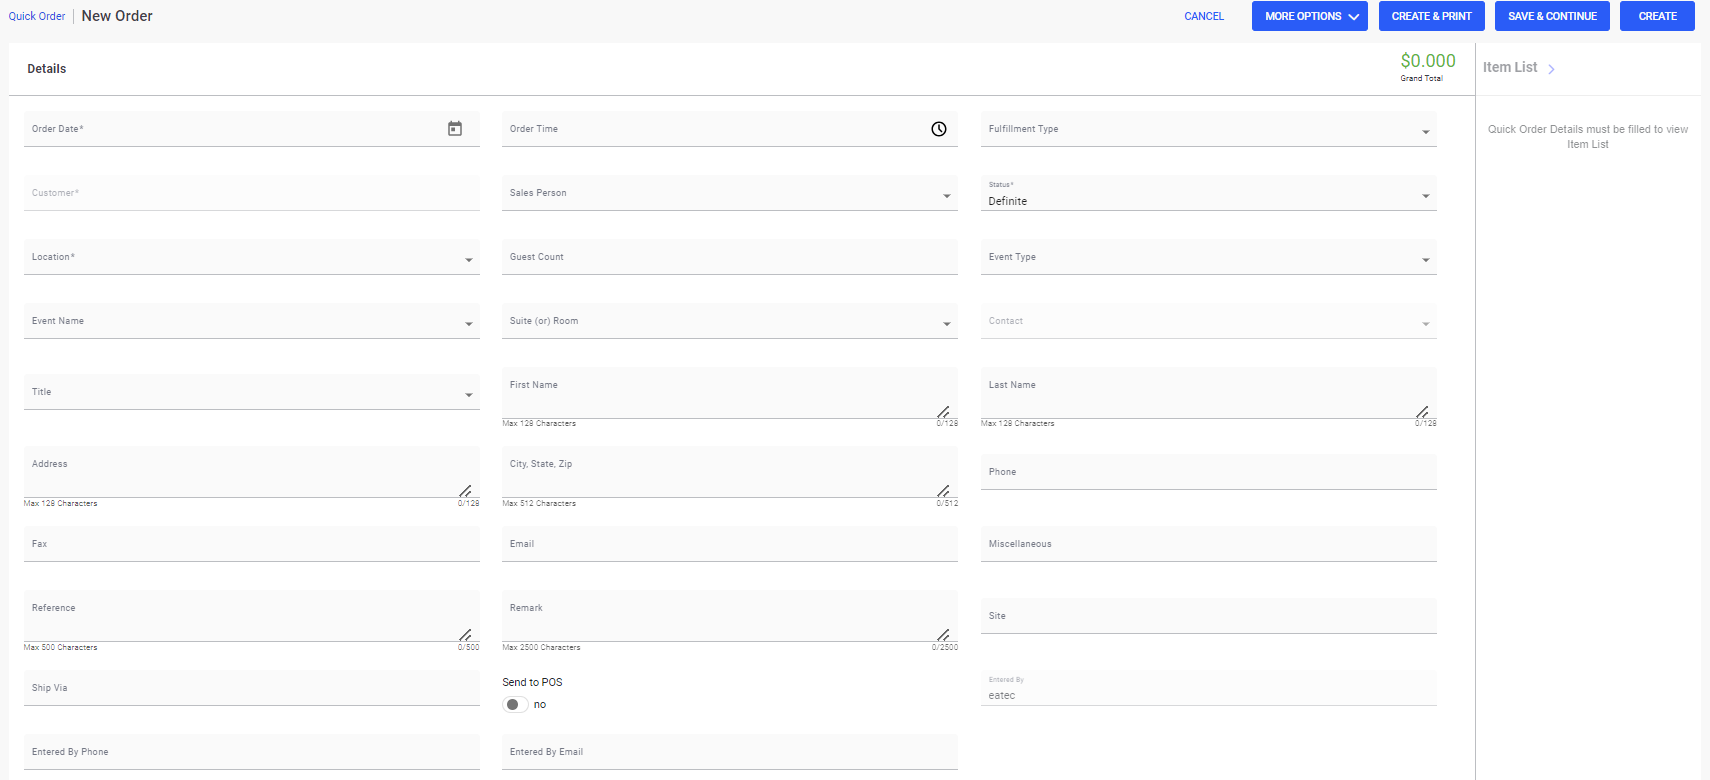
Refer to the following table and fill in the fields:
|
Field |
Description |
|---|---|
|
Order Date |
Select the date of order. |
|
Order Time |
Select the time of order. |
|
Fulfilment Type |
Select the fulfilment type. |
|
Location |
The location where item depletion occurs. |
|
Customer |
Select the name of customer. This field displays the Add New Customer option that allows users to add customers directly by entering the customer details. |
|
Sales Person |
The sales person associated with the customer. |
|
Status |
The status of the quick order. Select the status from the drop-down list:
|
|
Guest Count |
The total number of guests. |
|
Event Type |
Select the list of event types from the drop-down list. |
|
Event Name |
The name of the event planned on the order date. Allows users to add events conducted on the order date. Based on the selected order date, the list of events scheduled on the same date is displayed. On selecting the event, the event type gets auto populated in the Event Type drop-down list. Event types are created in Setup ➜ Product ➜ Event Types. |
|
Suite (or) Room |
The list of active rooms associated with the quick order. The values in this drop-down list are created under Setup ➜ Rooms. |
|
Contact |
Select the preferred contact from the contact list. This field displays the Add New option that directs users to the Create Contact window to create contacts by entering the contact details. The Create Contact window allows users to enter details in the following fields:
|
|
Title |
The title of the contact. For example, Dr, Prof, Mr |
|
First Name |
The first name of the contact. |
|
Last Name |
The last name of the contact. |
|
Address |
The address of the contact. |
|
City, State, Zip |
The city, state, and zip code of the contact. |
|
Phone |
The phone number of the contact. |
|
Fax |
The fax number of the contact. |
|
|
The email address of the contact. |
|
Miscellaneous |
Optional text field. |
|
Reference |
Optional text field. |
|
Remark |
Optional text field. |
|
Site |
The delivery location of the order. |
|
Ship via |
Optional text field. |
|
Send to POS |
Enabling this flag allows users to export quick orders from Eatec (Quick Orders module) to any POS system. Currently, this feature is applicable only to InfoGenesis POS. Enabling this flag displays the External POS drop-down list. When a quick order is created after enabling the Send to POS flag, the quick order gets created in the Eatec database and also an order request is sent to the selected POS system (InfoGenesis). Once the order request is successfully received by the POS system, a check number is returned to Eatec. The check number is saved towards the respective quick order and is displayed in the View page in the Reference field of the quick order. Quick orders that are exported to a POS system cannot perform the following functions: Finalize, Deplete, and Invoice. |
|
POS System |
This drop-down displays the list of eligible POS systems that supports quick orders export. By default, IG (InfoGenesis) is displayed. |
|
Entered By |
Denotes that the order is created using the username (system generated). |
|
Entered By Phone |
Enter the phone number used to create the quick order. |
|
Entered By Email |
Enter the email address used to create the quick order. |
|
Entered On |
The date of entry. |
Click to expand the Item List section to add items under products.
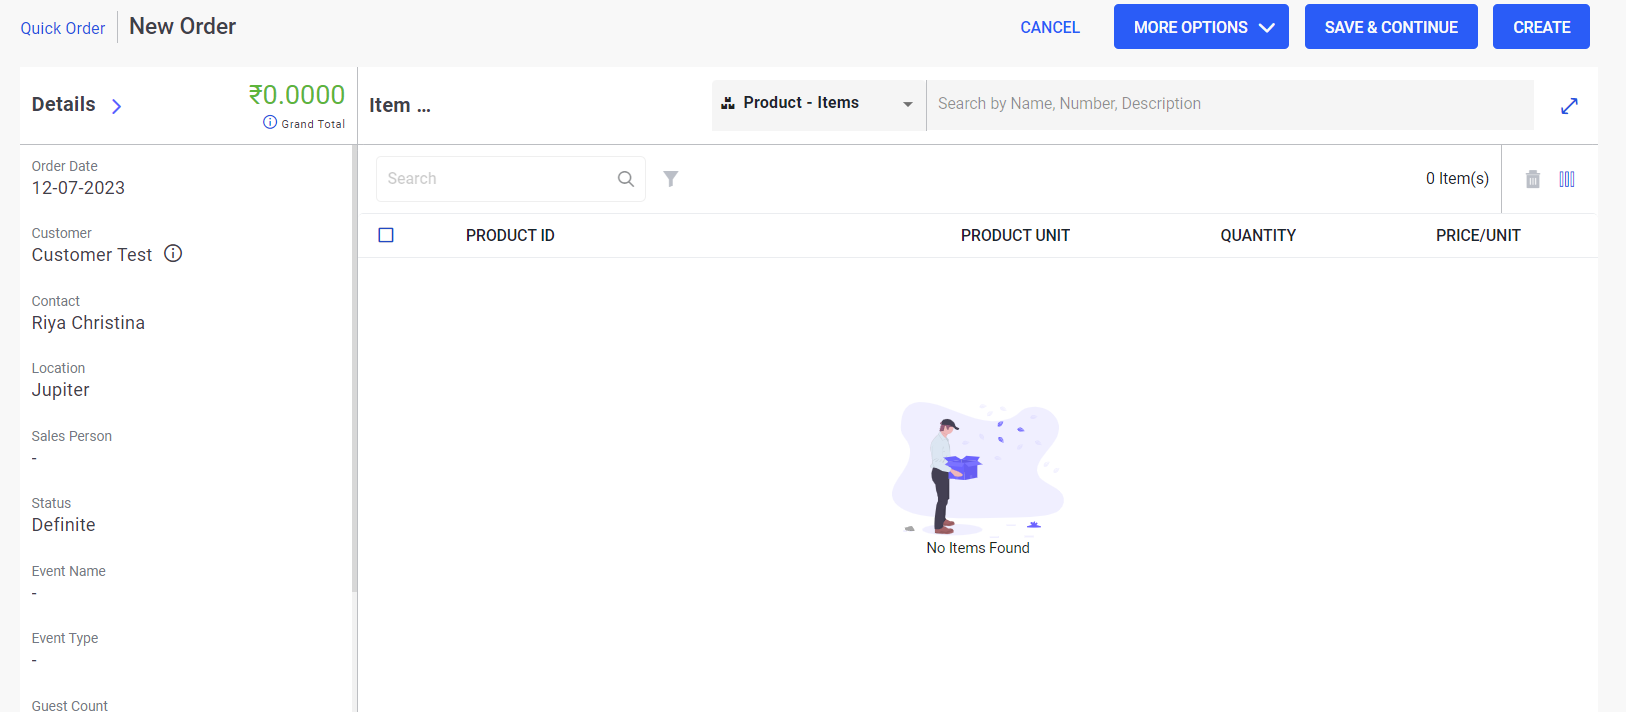
Select the preferred category from the Product drop-down list:
-
Items - a single item that belongs to the inventory
-
Packages - a logical grouping of inventory items
-
Class - a broader classification of the inventory item
-
Type - the type of inventory item
Perform a keyword search in the Search box. Users must enter the item name/number/barcode/description in the Search box if the selected item belongs to an inventory.
Select the desired items by enabling the respective checkboxes.
Click Select. The created items appear under the Item List section with the following details:
|
Field |
Description |
|---|---|
|
Product ID |
The name of the product. Users can add only active products to the Item List section and post quick orders. This is a read-only field. |
|
Product Unit |
The unit of the product that is added. This is a read-only field. |
|
Quantity |
Enter the quantity or number of units required for the order. |
|
Price/Unit |
The price of the item per unit. The value is auto-populated based on the price of the product defined under Masters ➜ Products. If required, users can also modify the price and will not replace the actual price that was defined. |
|
Amount |
The total cost of the item (item quantity × item price per quantity). The total amount gets auto filled when the quantity and price are entered. Also, if the value (amount) in this field is altered or modified, the value in the Price field also changes and is automatically updated. |
|
Tax Rate% (1) |
The tax rate that is configured in Setup ➜ Product Types. Based on the selected tax type, the tax rate must be defined for a region under Setup ➜ Tax Rates ➜ New Tax Rates. |
|
Tax Rate% (2) |
The tax rate that is configured in Setup ➜ Product Types. Based on the selected tax type, the tax rate must be defined for a region under Setup ➜ Tax Rates ➜ New Tax Rates. |
|
Tax Amount 1 |
This amount gets auto populated once the tax percentage is calculated as defined. |
|
Tax Amount 2 |
This amount gets auto populated once the tax percentage is calculated as defined. |
|
Tax Value |
The tax value. Tax is a value which is provided while defining product type and service charge. |
|
Remarks |
Remarks, if any. Optional text field. |
Click on the item to modify or enter unit, quantity, and amount. Perform the same for other items, if any.
Click Create. Quick order is successfully created.
Adding New Item List
Enter the name/number/barcode/description of an item in the Search box. A pop-up appears with the list of items.
Click Add New. The Add New Item List pop-up appears.
Fill in the details in all the mandatory fields.
Click Save to save the changes.
Click Set Item.
Filtering Items from the Item List
Users can filter items from the item list based on the filter parameters.
Click the Filter icon. The Filters pane appears with the following filter parameters:
-
Status
-
Active
-
Inactive
-
-
Class
-
Type
Select the preferred filter option.
Click Apply.
Deleting Items from the Item List
Click to expand the Item List section to add items under products.
Search for or enter the name/number/barcode/description in the Search box. The items available in the inventory are displayed under the Item List section.
Select the item to be deleted by enabling the checkbox corresponding to the item.
Click the Delete icon. The item is deleted from the inventory list but is available in the inventory.
Configuring Media Assignment to Quick Order
Once the items are added or modified, media assignment must be configured.
Users can assign the medium of payment received from the list of media available. The amount received can be from different mediums and may or may not match the grand total of quick order.
Any balance amount to be received or any additional amount is auto filled under the Over/Short media type. Over/Short is a read only system-defined media type field. Users can enter only numerical values. Any excess or shortage amount collected is accounted to this media type and its account as mapped. For example, if the quick order net amount is $500, then by default where no media types are assigned, the system auto populates $500.00 in the field of Short/Over media type.
Users must not deactivate the Over/Short media type.
The net amount against Quick Order is collected through different media/tender types.
Users must enter the amount under specific media type with respect to the grand total of Quick Order. The remaining amount to be collected in correspondence to the amount entered in Media Assignment is automatically adjusted.
Pre-requisite to define media types is, users must set up the following:
-
Account Categories
-
Chart of Accounts
Perform the following steps to configure media assignment for quick orders:
Click Sales ➜ Quick Orders.
Select and open an existing order.
Click More Options ➜ Media Assignment. The Media Assignment pop-up appears.
The media types created under Setup ➜ Account ➜ Media Types are displayed in the Media Assignment section.
Fill in the details in all the fields in the Media Assignment pop-up.
Click Confirm.
Configuring Order Setting for Quick Orders
Click Sales ➜ Quick Orders.
Click Create New. The New Order page appears.
Or
Select an existing order and click ellipses under Action corresponding to the selected order.
Click Edit. The Edit Order page appears.
Click More Options ➜ Order Setting. The Order Setting pop-up appears.
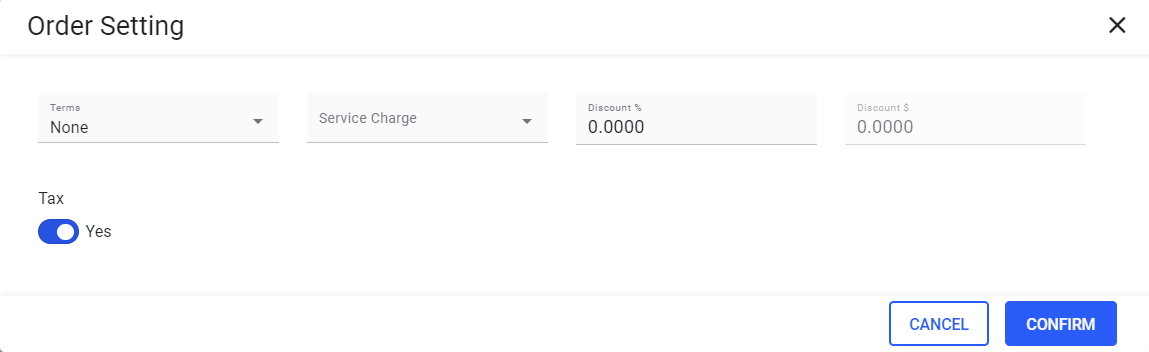
Refer to the following table and fill in the fields:
|
Field |
Description |
|---|---|
|
Terms |
Displays the list of terms defined in Setup ➜ Terms ➜ Pay Terms. Terms is applicable to both accounts payable and accounts receivable functions within the program. Users can enter a new supplier or customer and designate the terms applicable to the customer or supplier. The supplier terms are automatically associated with posted supplier invoices and used in generating various aging reports. Terms for each customer is listed as default on the sales orders and is used in generating receivables reports. |
|
Service Charge |
Displays the list of service charges as defined in Setup ➜ Catering ➜ Service Charges. Service charge is applied over the quick order from the order settings. Users can also mark any one service charge as default. The default service is applied to the net amount of Quick Order until modified. The tax name selected for each service charge is applied in the percentage (%) on top of the service charge value as applicable. |
|
Discount % |
Enter the discount value in percentage. Discount % is a discount by percentage applied to the net amount of quick order. When users enter a value, the value arrived from the percentage of net amount of quick order is subtracted from the net amount of quick order. The maximum value allowed in this field is 100. |
|
Discount $ |
This is a read-only field. Users can infer the total discount value applied over the net total of Quick Order. The value displayed in this field is calculated from the input provided in the Discount % field. This value is calculated as, Discount (%)/100 × Net Amount. The resulting value is deducted from the net amount of the order when the grand total is calculated. |
|
Tax |
When this flag is enabled, the tax percentage is applied over the products sale amount and service charge applied. Tax is a value which is provided while defining product type and service charge. By default, the flag is enabled. |
Click Confirm.
Configuring Memo
This option allows users to add special instructions/descriptions or presentation notes for a quick order. Users can add only one note per quick order. Users can enter up to 2,500 characters.
This option is available in the following screens in the Quick Order module:
-
Create New - new quick orders are created.
-
Edit - only the saved quick order information is displayed allowing users to modify the details as preferred.
-
View - the memo appears only in the read-only mode.
Click Sales ➜ Quick Orders.
Click Create New. The New Order page appears.
Or
Select an existing order and click ellipses under Action corresponding to the selected order.
Click Edit. The Edit Order page appears.
Click More Options ➜ Memo. The Memo pop-up appears.
Enter a description or note in the Memo text box.
Click Confirm.