Assigning Bins
Users can assign bins to preferred items by performing the following steps:
Navigate to Inventory Management ➜ Bin Management to access the Bin Management module.
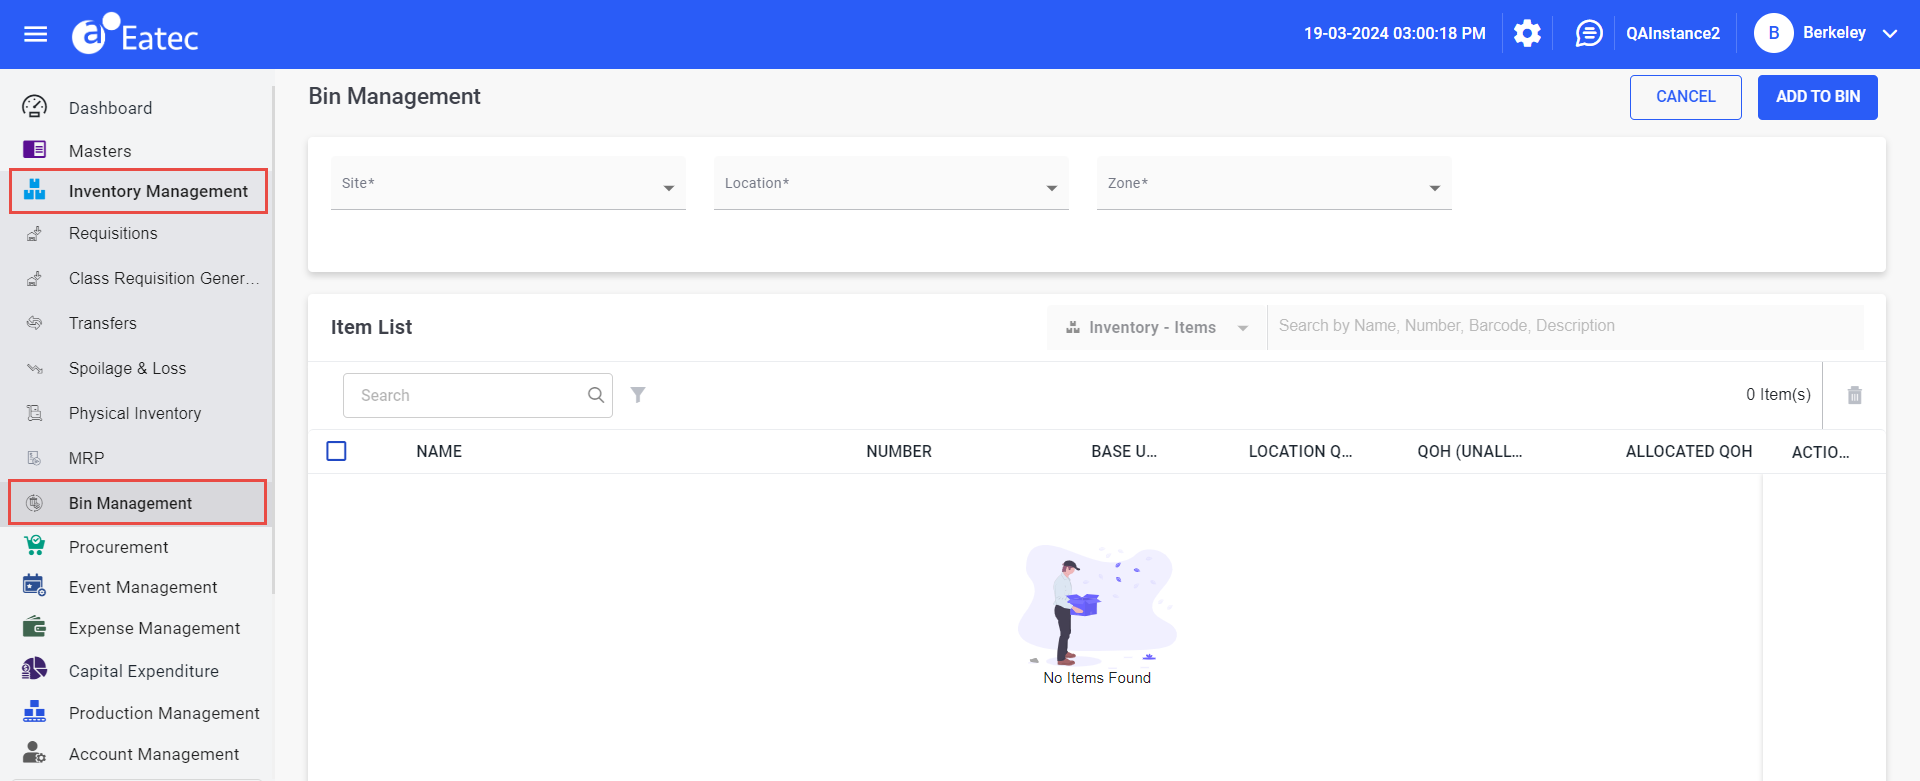
Select the site name using the drop-down list in the Site field.
Select the location name associated with the selected site using the drop-down list in the Location field.
Select the zone name associated with the selected location using the drop-down list in the Zone field.
Select the inventory category from the following drop-down list:
-
Items - a single item that belongs to the inventory
-
Packages - a logical grouping of inventory items
-
Class - a broader classification of the inventory item
-
Type - the type of inventory item
Perform a keyword search in the Search box.
Users can enter the name/number/barcode/description in the Search box if the selected item belongs to an inventory.
Users can enter the package name in case of package.
Select the desired items by choosing the respective checkboxes.
Click Select. The items appear under the Item List section with the following details:
|
Field |
Description |
|---|---|
|
Name |
The name of the inventory item. |
|
Number |
The unique identification number of the inventory item. |
|
Base Unit |
The abbreviation of the base unit of measure. |
|
Location QOH |
The inventory item’s total quantity on hand available in the current location. |
|
QOH (Unallocated) |
The inventory item’s quantity available in the location that is not allocated to any bin. |
|
Allocated QOH |
The inventory item’s total quantity on hand that is allocated to bins. |
Click the Info icon next to the item name to view the following details associated with the item:
-
Identification
-
Name
-
Barcode
-
Number
-
Type
-
Class
-
Description
-
-
Status
-
Valuation
-
Quantity on hand
-
Quantity on order
-
Quantity on requisition
-
Quantity on return
-
Wt average cost
-
-
Definition
-
Base unit
-
Conversion
-
Current cost
-
Purchase unit
-
Purchase conversion
-
Purchase cost
-
Transaction unit
-
Transaction conversion
-
Transaction cost
-
Recipe unit
-
Recipe conversion
-
Recipe cost
-
Remarks
-
Remove any item if required by selecting the preferred item and clicking the Delete icon.
Click the action button corresponding to the preferred item. The Edit Bins page for the selected item appears with the following details:
-
Item
-
Location
-
Zone
-
QOH (Unallocated)
-
Base unit
Click +Add Bin.
Select the preferred bin using the drop-down list in the Bin field. Users must choose an option from the available bins for the selected location and zone.
Select the bin priority using the drop-down list in the Bin Priority field. Available options include the following:
-
Primary
-
Secondary
-
Alternate
Enter the bin capacity value in the Bin Capacity field. Users must enter the capacity of current bin to hold maximum number of quantities of the inventory item. The bin capacity is entered in the unit of measure of the item’s base unit.
Enter the quantity which is desired to be allocated to the selected bin in the Bin QOH field.
Click Confirm. The modified data gets updated in the Item List section on the Bin Management page.
The Allocated QOH value must not be greater than the QOH (Unallocated) value.
The Allocated QOH value must not be greater than the Bin Capacity value.
Click the Add to Bin button. The items are saved to the assigned bin successfully.
When users allocate inventory items to bins available in a zone at a location, Eatec generates a Bin Item Number for quick identification. The purpose of this number is to precisely pick an inventory item available in a particular bin from a particular zone in a particular location.
The bin item number includes the following values:
-
Location Label Code
-
Zone Code
-
Bin Code
-
Bin Item Number
For example, consider the following values:
|
Component |
Value |
|---|---|
|
Location Label Code |
135 |
|
Zone Code |
12 |
|
Bin Code |
01 |
|
Bin Item Number |
122 |
The Bin Item Number generated is 135-12-01-122.